Monday, December 5, 2016

Natural Dying and Printing Paper ("Eco Printing")


I have found dying and printing paper with fresh plant material is so enjoyable and addictive that I always make sure I have some sort of steamer and a supply of paper no matter where I go. So while my husband and I were vacationing in North Georgia last November during the peak of the fall foliage. I  couldn't resist playing with all of theses amazing colors.  Florida has many equally spectacular shows of natural beauty but our fall is much more subtle, so I go a bit bonkers when I am up North during the fall!  I hope you enjoy this little video I created about creating art paper with fall leaves.


Here is a bit more detail about the method I used,to help you make you own prints or just Google "eco printing paper"for more ideas!

25-50 sheets of acid free water color, card stock  or other art paper
Card board (2 pieces cardboard cut to the size of the paper)
Alum
Water
Plastic dish pan
A pot or roaster (designated for art use only)
Tongs(designated for art use only)
Plastic drop clothe to protect tale work surface
Ruler or other straight edge
An assortment of leaves, flowers, tea and colorful herbs.
1.       Mix one tablespoon of alum into a cup of boiling hot water and stir until completely dissolved.
2.       Mix the alum solution with 1-2 gallons of warm water in a tray or dish pan.
3.       Add the paper and let it soak. for 15-20 minutes (it is best to add paper to the water one sheet at a time to they don’t all clump together)
4.       Carefully remove paper from water and spread on your protected work table.
5.       Arrange leaves and flower petals on the paper.
6.       Stack up to 25 sheets of paper and sandwich them between two pieces of card board.
7.       Pound the stack to remove any gaps or bubbles , insuring the plant material is making good contact with the paper. Bind very tightly with sting.
8.       Put the bundles in a pot or roaster  on a rack above several inches of water.  Steam for 1-2 hours. Or put bundle directly into the water or a dye bath. Raise the temperature just below a boil. Allow to simmer for 1 to 2 hours.
9.       Use tongs to remove the bundles allow them to cool bit.
10.   Carefully unbundle the paper, being careful not to tear the fragile wet paper.  Pick off plant material.  Separate and spread the papers to dry on a flat surface. It plant material is stuck,  allow the paper to dry some before trying to remove  it.   *Tip create ragged or feather edges to give paper an artistic handmade look:  While the paper is still wet, place a ruler or other straight edge firmly against the outside edges. Make a crease and tear of the edge with the ruler still in place.

11.   Once the paper is dry, dust off any remaining residual plant material 


Tuesday, August 30, 2016

More About Pecans


In the last post  Pecan Season ....a Florida dyer's favorite time of year.I made at by previous blog I promised more info about pecans as well as other Florida plants that are my favorites for natural dying and contact printing. So here it is. I know, I know, its been a very long time.... 


I'm still yet to be lucky enough to beat the squirrels to very many pecans, but still look forward to collecting the fresh hulls they leave behind. From them I get fabulous rich shades of  brown ranging from dark chocolate, with a minute amount of iron. With no mordant or mordanted with alum the hulls will give me warn tones of coffee. . A bit of copper give the browns a wonderful gold or bronze glow.  Sometimes I like to tie the hulls directing into the wet mordanted fabric and add to a hot dye bath or steam. Or as in the case of the scarves below I just seal the in a glass jar and let them heat in the Florida sun over a period of days or weeks.  The silk scarf on the left was premordanted with potassium alum, Bundled with pecan hulls and copper pennies then steeped in a cochineal dye bath.  The second and the last scarf were bundled with eucalyptus and camphor leaves and steeped in a bath of dye extracted from pecan hulls. The middle scarf was tied with acorns, bits of pecan hulls, copper pennies and left to heat in a steamy jar for several weeks.  Then it was taken out and splashed with a very weak solution of iron water, returned to the jar for a few more days.  The one in back(I'm sorry doesn't show up well is the result of mordanting the cloth with copper before tying and bundling with the fresh hulls and again, allowing the wet silk to heat in the sun a few days in a sealed jar


Detail photos of the firsts scarf on the left and the middle scarf


Detail of second scarf.


The photo below is an example of brown obtained just from contact dying with fresh pecan hulls on silk with no mordant.  Pecans produce a substantive dye and require no mordant to be color fast, I add various mordant to alter the color though.


Although the fresh hulls render the most potent and concentrated dye, the leaves or bark of the tree also renders strong dyes.  The leaves are particularly good for "eco" or contact printing requiring no mordant to be colorfast.  However, in the photos below the one on the left was mordanted with a very light iron light soak, even a tiny bit more iron would leave black prints,  The one on the left I used copper.


This paper was dyed and printed by first soaking in alum with a bit of soda ash.  Then I steamed with slivers of  curcumin root (turmeric),  hibiscus flowers and pecan leaves.  The alkaline ph turns red hibiscus blue or green. The yellow is from the turmeric, which also mixed with the hibiscus and brightened the green.


Friday, July 1, 2016

Rust Dying Fabric


 If you haven’t tried rusting fabric and would like to, its really simple, very exciting and rewarding. The following is all you'll need to know to try it.


 1. Spray or soak fabric with a solution of 50% water and 50% white vinegar. 

 2. Spread the wet fabric in a plastic container like a dishpan or storage bin and arrange rusting  objects on top of it or wrap the wet fabric around a rusty object and lay it in the plastic  container 

3.Then wait it usually takes only a day or two but you need to keep the fabric wet with the vinegar and water. Some people like to cover it all with plastic to keep it wet, but remember that you want to let in air because oxygen it what causes oxidation (rusting) so wrap it loosely if you do. 

4. When you have the amount of color you want, rinse with a solution of water and baking soda to neutralize the acid before washing, there by inhibiting the process. And that’s all there is to it But there are a couple important things to keep in mind: 

   A. Just because rust is so familiar and generally not considered toxic, this does not mean you should ignore safe studio practices. Rust is iron oxide which could harm your health if you have to much contact with it. So it is advisable to wear your gloves and mask if you plan on doing this often And be sure keep young children and pets away from the rusty liquid!

   B.  Rusted fabrics will eventually degrade (although it may take years) because oxidation continues as long as it is exposed to oxygen. Therefore, rusted fabric may not be the best choice for a quilt that you are planning to hand down to you grandchildren.  If you would like more information about the process, I found Kimberly Bater Packwood’s Blog http://www.prairiefibers.com/Rust%20Dyeing.htm is very informative and helpful.  Also, she has some very affordable and informative ebooks on natural dying as well as on line classes available @ http://prairiefibers.com/


The "before" of the illustration at the top of the page.  Vinegar and water soaked silk wrap around an old rusted cast iron window weight,


Ice Dying


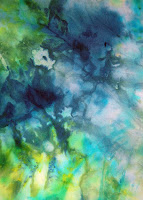
This technique of dying fabric yields most spectacular results, yet it is so simple and there is very little labor invested.  The hard part is waiting to see the magic!


Here’s how:
Material List:
Silk, wool, cotton, linen or any other natural cellulose or protein (animal) fabric
A supply of two or more colors of procion fiber reactive dyes
Soda ash
synthrapol or dawn dish soap
1 lg plastic storage bin or box of some type
1 shallow plastic container such as a dish pan
Any type of metal or plastic rack that will cover the top of the small container
Rubber gloves
Dust mask
Apron or very old clothes

Do this outside!
  1.  Prewash you fabric in warm to hot water with synthrapol or dawn dish soap and rinse.  Do not add fabric softener to to the rinse water
2.   Soak you fabric in a solution of ½ cup soda ash(used for raising ph from the pool supply venders)

3.    Set  up some type of  container  with a rack on top (I’ve used plastic food storage containers with cheap cooling racks purchased at the Dollar Tree)  Put it inside some type of box to use as a baffle to prevent dye powder from  being carried by  drafts . (Here I’ve used a lg plastic storage bin.)


1.   Soak you fabric in a solution of ½ cup soda ash(used for raising ph from the pool supply venders)
2.       Set  up some type of  container  with a rack on top (I’ve used plastic food storage containers with cheap cooling racks purchased at the Dollar Tree)  Put it inside some type of box to use as a baffle to prevent dye powder from  being carried by  drafts . (Here I’ve used a lg plastic storage bin.)


4.   Pile ice on top of the fabric.


5.       Sprinkle dye powders on top of the ice.  (Wear your rubber gloves and A DUST MASK!)


6.   Leave it and let the ice melt.  You may want to cover the whole thing with a drop cloth, or a plastic to keep out pets or wild life. 


7.   After the ice has melted keep covered with black plastic in the sun to keep it warm and let it cure for 24 hrs for the best results to insure colorfastness.      

8.    Put on your rubber gloves rinse the cloth in cold water.  Then wash in hot or warm water with synthrapol or dawn dish soap. You may have to do this more than once to remove all of the unbound dye. Launder the cloth in your usual manner and as appropriate for the type of fabric  you have chosen.

9.   Admire your "work!"